jueves, 14 de febrero de 2013

White O

Architect: Toyo Ito & Associates, Architects
Location: Marbella,
Local Architect: Christian de Groote
Project Area: 370 sqm
Project year: 2009

White O_Toyo Ito (75)
White O at night

The site for this weekend house slopes gently down to the north-east, and has attractive views in the same direction. This proposal is intended to make dynamic use of the whole site, taking advantage of the special qualities created by this slope. 

White O_Toyo Ito (10)


White O_Toyo Ito (1)

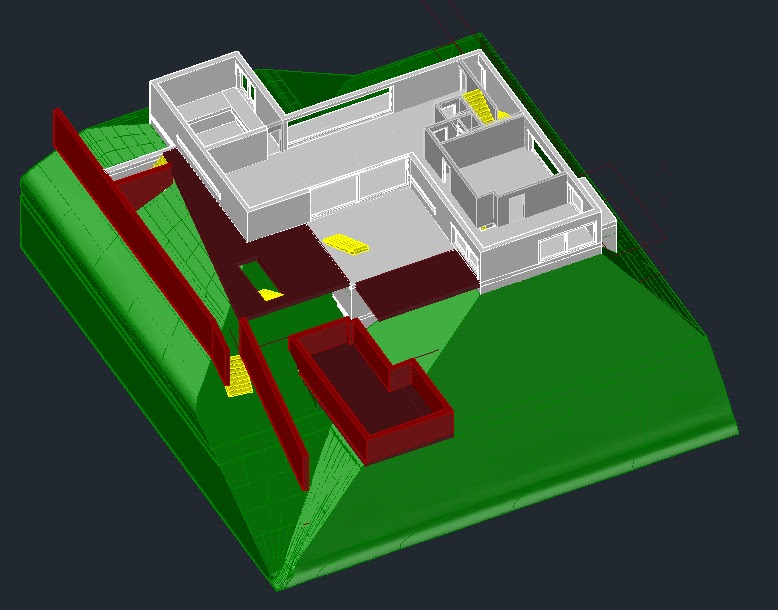
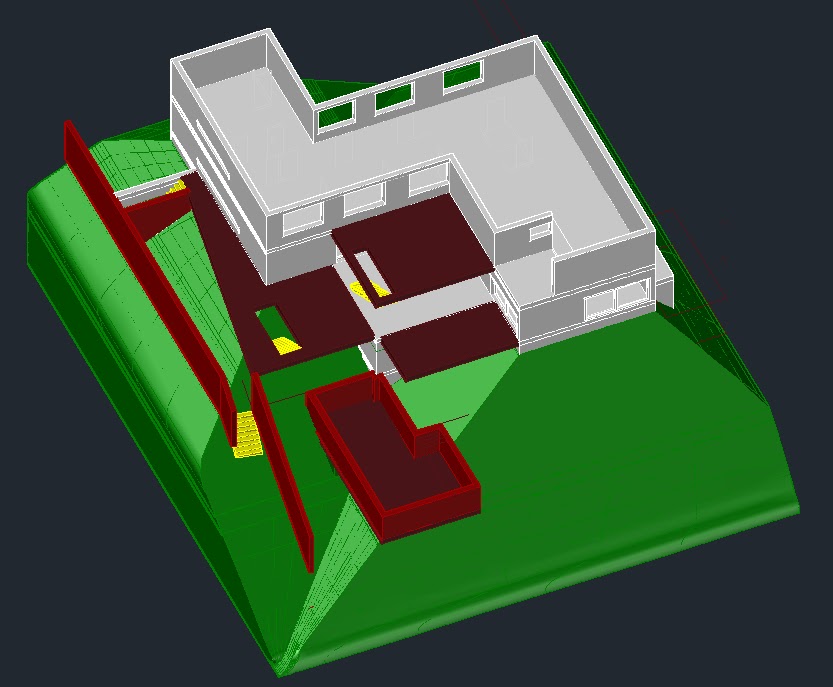
The house and site are composed together as a single continuous space, flowing along a spiral movement path, and centered on a partially enclosed garden. The approach to the house rises along the natural line of the slope, drawing visitors toward the rear of the site. Within the inner garden, the slope becomes continuous with the floor of the house, and then flows around and up to the more private areas of the house.

ground floor plan
Ground floor plan

White O_Toyo Ito (68)

Beyond the entrance is a spacious living area, which leads on to an adjacent dining area. We expect that the inner garden and the living and dining spaces will be used together, allowing a free indoor-outdoor lifestyle. Further ascending via a gentle ramp which wraps around the inner garden, the interior makes a fluid transition into a private zone containing bedrooms. Floating above the ground, these spaces have complete privacy.

White O_Toyo Ito (41)

Ascending the slope to the rear of the site, entering the house, and moving through the continuous interior – the house and site composed as a fluid progression of interior and exterior spaces with gradually changing characters and orientations.

jueves, 17 de enero de 2013

Imágenes Casa B-10 en autocad 3D y explicación

En este proyecto en 3D, hemos partido de los planos en 2D que ya habíamos proyectado con antelación.


Basándonos en los planos en 2D de la casa B-10, empezamos por realizar el terreno (mediante el comando loft), definiendo el contorno. Después, levantamos el forjado de la planta mas baja, la planta sótano -2, mediante el comando presspull. Cuando ya tenemos el forjado, procedemos a levantar los muros y los tabiques. Una vez lo tenemos, situamos los huecos (carpinteria, huecos de escalera...) con polilíneas en sus coordenadas correspondientes, y procedemos al vaciado del forjado y muros (si los tiene). Entonces, realizamos los marcos de cada carpinteria y tambien las escaleras. Y realizamos el mismo procedimiento por partes en las plantas superiores.


A continuación unas imagenes del procedimiento.

Terreno

Terreno + Planta Sótano -2 (1 parte)

Terreno + Planta Sótano -2 (2 parte)

Terreno + Planta Sótano -2 + Planta Sótano -1 (1 parte)

Terreno + Planta Sótano -2 + Planta Sótano -1 (2 parte)

Terreno + Planta Sótano -2 + Planta Sótano -1 (3 parte)

Terreno + Planta Sótano -2 + Planta Sótano -1 + Planta Baja (1 parte)

Terreno + Planta Sótano -2 + Planta Sótano -1 + Planta Baja (2 parte)

Terreno + Planta Sótano -2 + Planta Sótano -1 + Planta Baja (3 parte)

Terreno + Planta Sótano -2 + Planta Sótano -1 + Planta Baja + Planta Primera (1 parte)

Terreno + Planta Sótano -2 + Planta Sótano -1 + Planta Baja + Planta Primera (2 parte)

Terreno + Planta Sótano -2 + Planta Sótano -1 + Planta Baja + Planta Primera (3 parte)

Terreno + Planta Sótano -2 + Planta Sótano -1 + Planta Baja + Planta Primera + Planta Cubierta